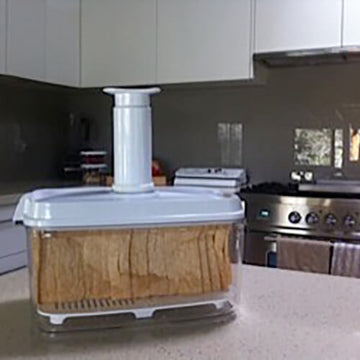
Bread You Buy vs Bread You Make.
We all know that commercial bread is stacked full of sugar, preservatives and enough chemicals that even mould won’t grow on it!
If you are old enough you will remember a time when Sunday mornings included a trip to the Hot Bread Shop. When you got it home the bread was so fresh it was almost impossible to cut. But a lick of butter and spread with vegemite or home made apricot jam & you had the stuff memories are made of.
No doubt you will also remember that a day later. The bread was so stale, not even the ducks would eat it! Vacuum Sealed Bread is so much better.
So we all like fresh bread but only while it stays Fresh! Keep it fresh as Vacuum Sealed Bread.
Here is where Vacuum Sealing Canisters come in.
If you are going to go to all the effort of baking a champion loaf, with NO PRESERVATIVES. Then you want it to last more then a day or two. So bake & stick it into your Large Vacuum Canister. You won’t waste a crumb! Vacuum sealed bread.
Of course some people will say: “Oh but you can just freeze it.” And perhaps you can? But when you are flat out in the morning, kids are running late as usual. Who has tome to thaw out frozen bread? Worse still, frozen bread never toasts properly. It is either burnt on the edges or cold in the middle.
In a perfect world you simply grab a slice of home made bread and put it in the toaster. Whilst you grab a coffee & get on with the other 101 other things you have to do every morning.
Now if you would like to give this great idea a try here is a Jamie Oliver Recipe that over 100 000 people loved. So give it a whirl.
Ingredients:
Simple Soda Bread – Does not need to rise. Just mix ingredients & straight into the Oven!
- 250 g wholemeal flour.
- 100 g plain flour, plus extra for dusting.
- 50 g pinhead oatmeal.
- 1 teaspoon bicarbonate of soda.
- 1 teaspoon Sea salt. (Note: Or try Himalayan Salt has a bunch of essential elements not found in most salts).
- 1 teaspoon sugar.
- 1 large free-range egg.
- 1 x 300 ml tub buttermilk.
Instructions:
- Preheat the oven to 190°C/375°F/gas 5.
- Place the flour, pinhead oatmeal, bicarbonate of soda, salt and sugar in a large bowl and mix together.
- In a separate bowl, use a balloon whisk to beat the egg and buttermilk together.
- Use a fork to stir the egg mixture into the flour. Then as it starts to come together, use your hands to pat and bring the dough together.
- Shape the dough into a ball and place onto a lightly floured baking tray. Use your hands to flatten the dough slightly so you end up with a disk, roughly 6 to 7cm thick.
- Score a cross into the top of the bread with the blunt edge of a knife. Bake in the centre of the oven for 50 to 60 minutes, or until a firm crust has formed and it sounds hollow when tapped on the bottom.
- Turn the bread out onto a wire rack to cool. Then serve slightly warm with some soup or a nice wedge of cheese.
Tips & Tricks:
- If you can’t find pinhead oatmeal, use rolled oats instead. Blitz them in a food processor first, then you’re good to go.
- Be careful not to over-mix the dough. Stop mixing as soon as it comes together otherwise you’ll end up with tough, dense bread.
- If you do have some left then place it in your Vacuum Sealed Canister for a longer, preservative free shelf life.
Vacuum Sealed Bread will last 3 – 5 times longer.


